Waivio

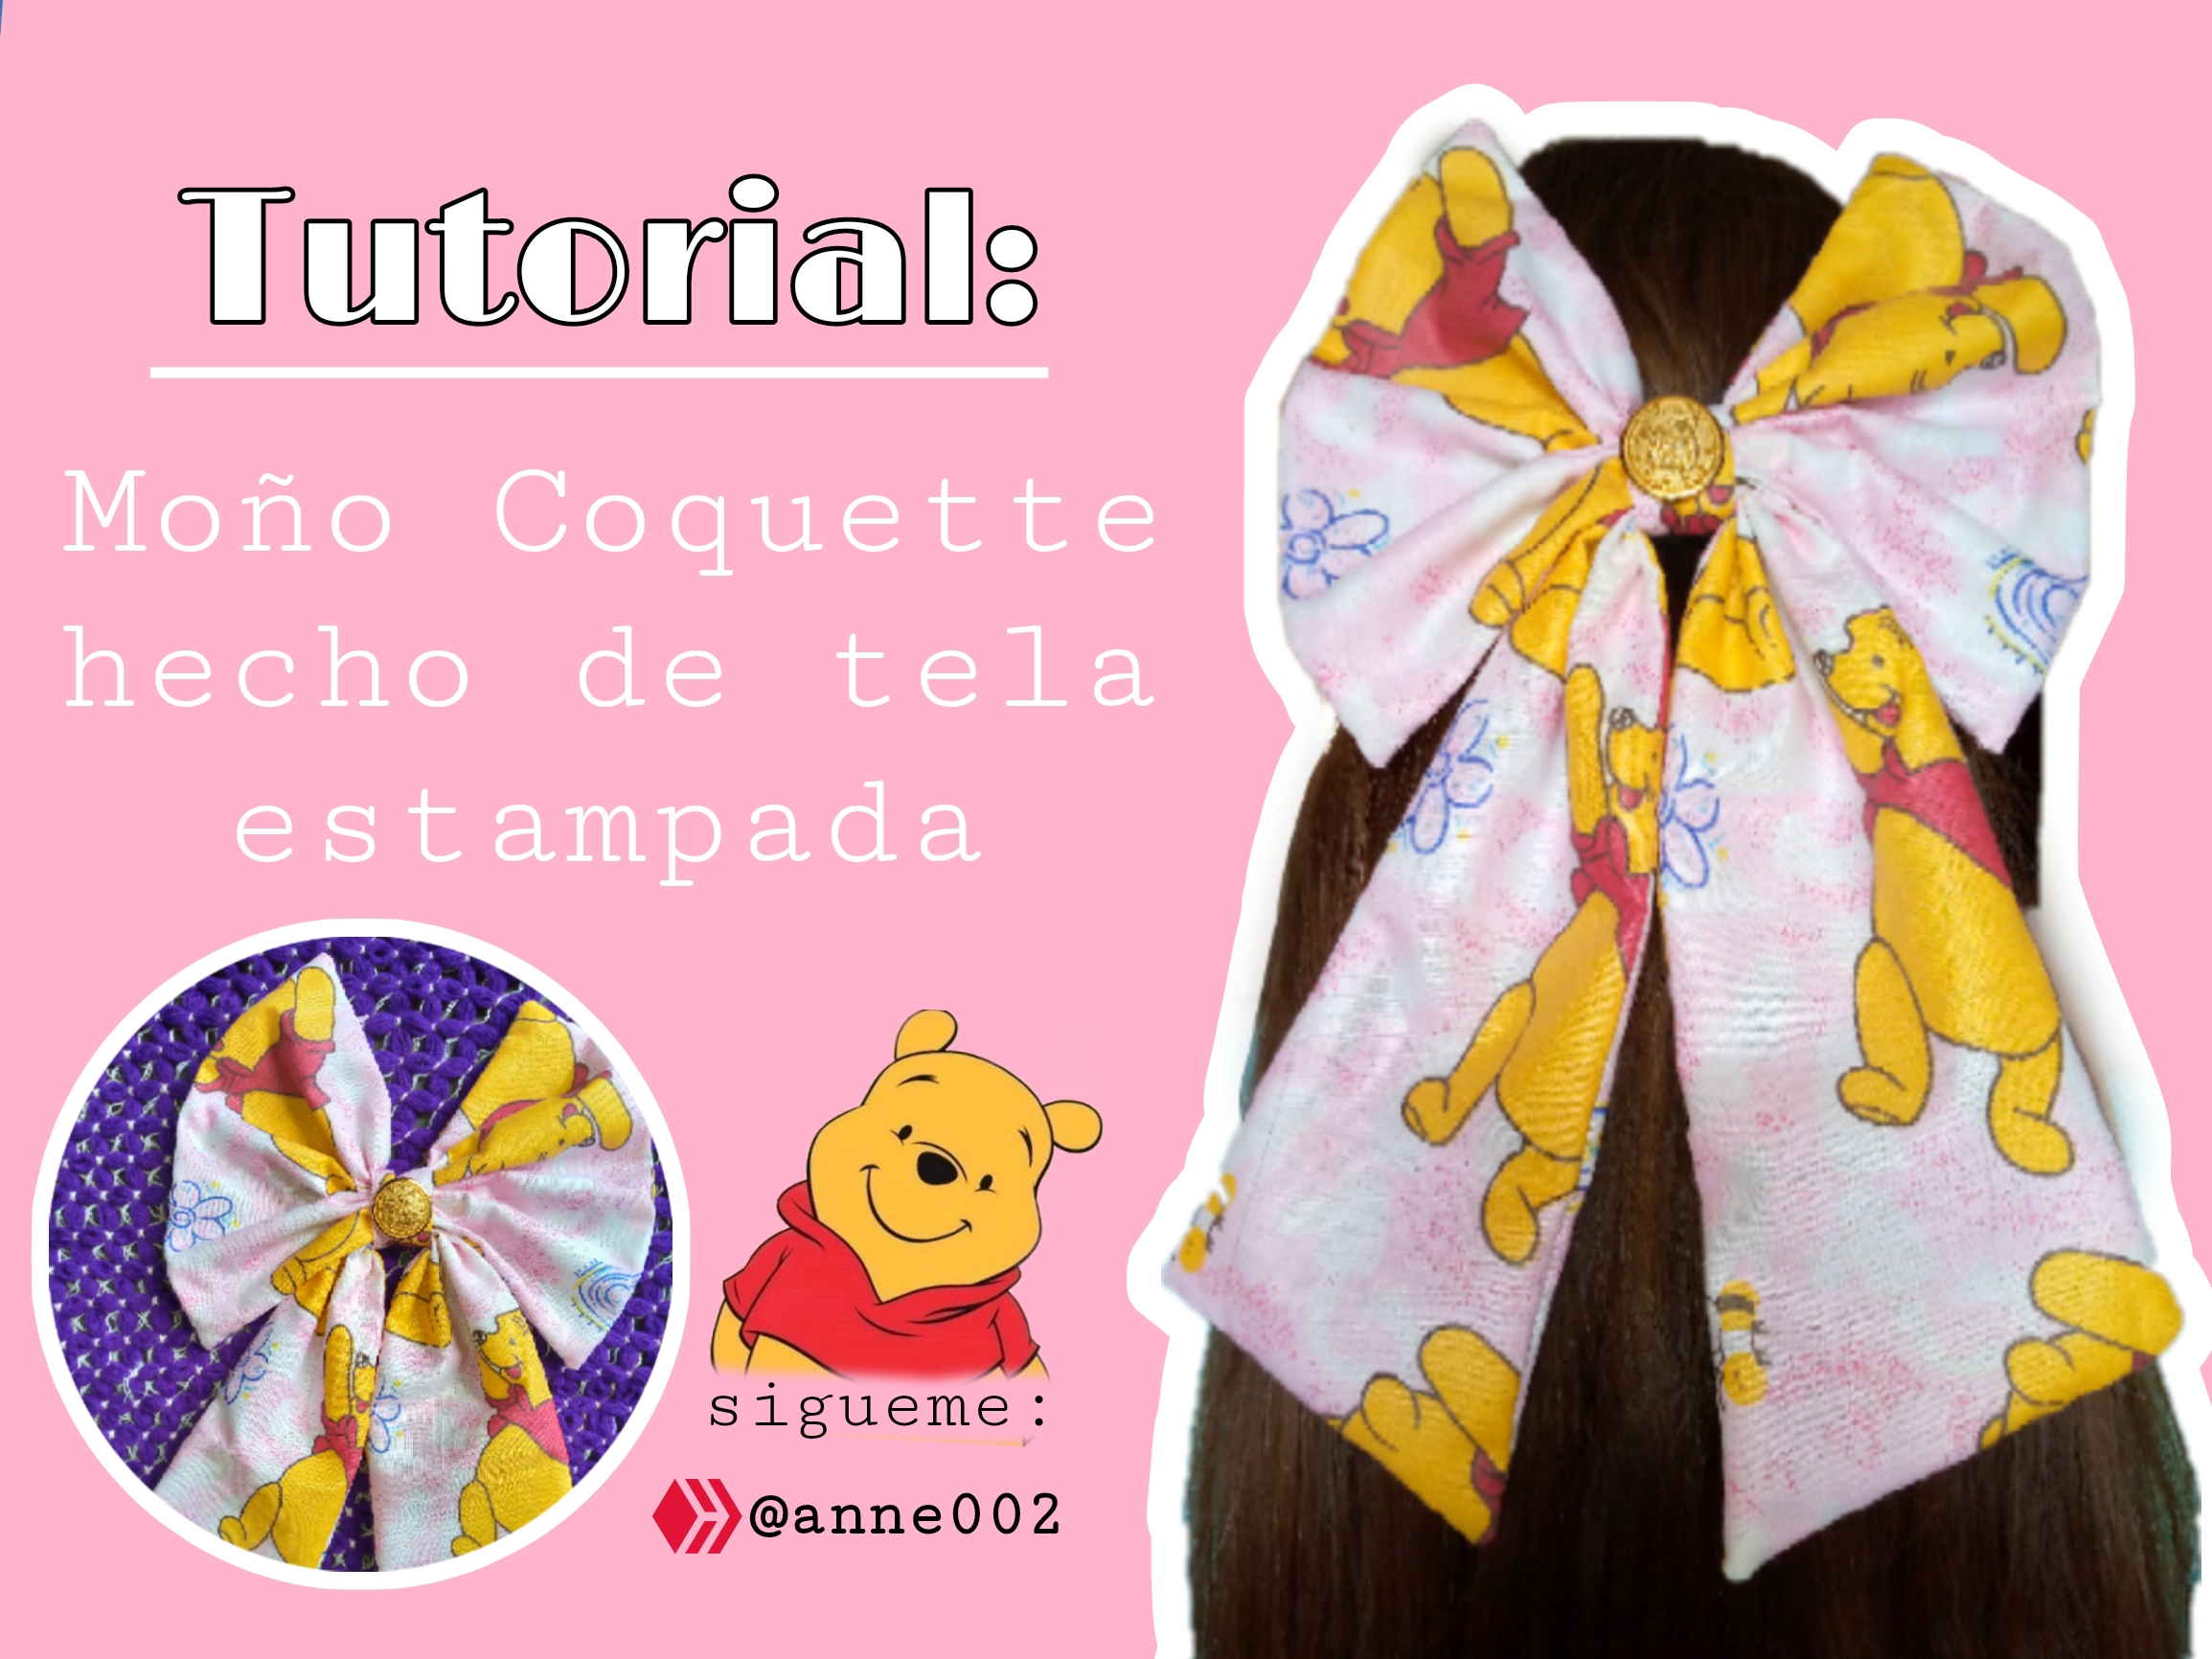
⬇️🎀💛Moño Coquette hecho a mano de tela estampada💛🎀//🎀❤️Coquette bow handmade from printed fabric❤️🎀 Esp-Eng

6 comments

anne002223.69last yearHive.Blog8 min read

https://images.hive.blog/DQmPQbBDvmHH3SrBQq16vp8JYwRH6Mfvx8TA79ojJzAxPvx/Picsart_24-05-27_17-33-10-350.jpg

Feliz hermosa tarde amigos creativos de esta bella comunidad espero se encuentren muy bien el día de hoy ❤️como están pasando su tarde con calor o sin calor ,aquí en mi ciudad llovió pero con todo y eso la lluvia dejó su calorcito acá ya mero entra la época lluviosa y los dias de frío amigos cuántos quisiéramos que en un lugar donde hace tanto calor nos tocase algo de frio aunque sea un ratito verdad...

Happy beautiful afternoon creative friends of this beautiful community I hope you are feeling very well today as you are spending your afternoon with heat or without heat, here in my city it rained but with everything and that the rain left its warmth here as the season begins rainy and cold days, friends, how many of us would like that in a place where it is so hot we would get a little cold, even if it is just for a little while, right...

Aprovechando la tarde algo calurosa quise terminar este lindo moño que ayer en parte hacía lo hice por partes pero ya lo he terminado , les cuento que acá se marchó la luz al mediodía así que me tocó coserlo a mano si amigos este trabajo es totalmente hecho a mano ya que nuestras máquinas funcionan es con luz bueno yo lamentablemente no tenía pero pierdan cuidado ya llegó la luz pero antes de hacerlo ya yo estaba en proceso de elaboración de este moño para que no me agarraste la noche y no pudiera coser asi que vamos al paso a paso para que vean como es que lo he hecho así con los materiales que tenia a la mano.

Taking advantage of the somewhat hot afternoon I wanted to finish this pretty bow that I was partly making yesterday, I did it in parts but I have already finished it, I tell you that the power went out here at noon so I had to sew it by hand yes friends this work is completely done by hand hand, since our machines work, it is with light, well, unfortunately I didn't have one, but don't be careful, the light has already arrived, but before doing it, I was already in the process of making this bow so that you wouldn't catch me at night and I couldn't sew, so let's go to the step by step so you can see how I have done it this way with the materials I had on hand.


https://images.hive.blog/DQmb5wnhbmmrT6QR9GPhNv31TLQM3zNypmuQ2jHVeFg484s/IMG_20240527_104631_780%20(1).jpg

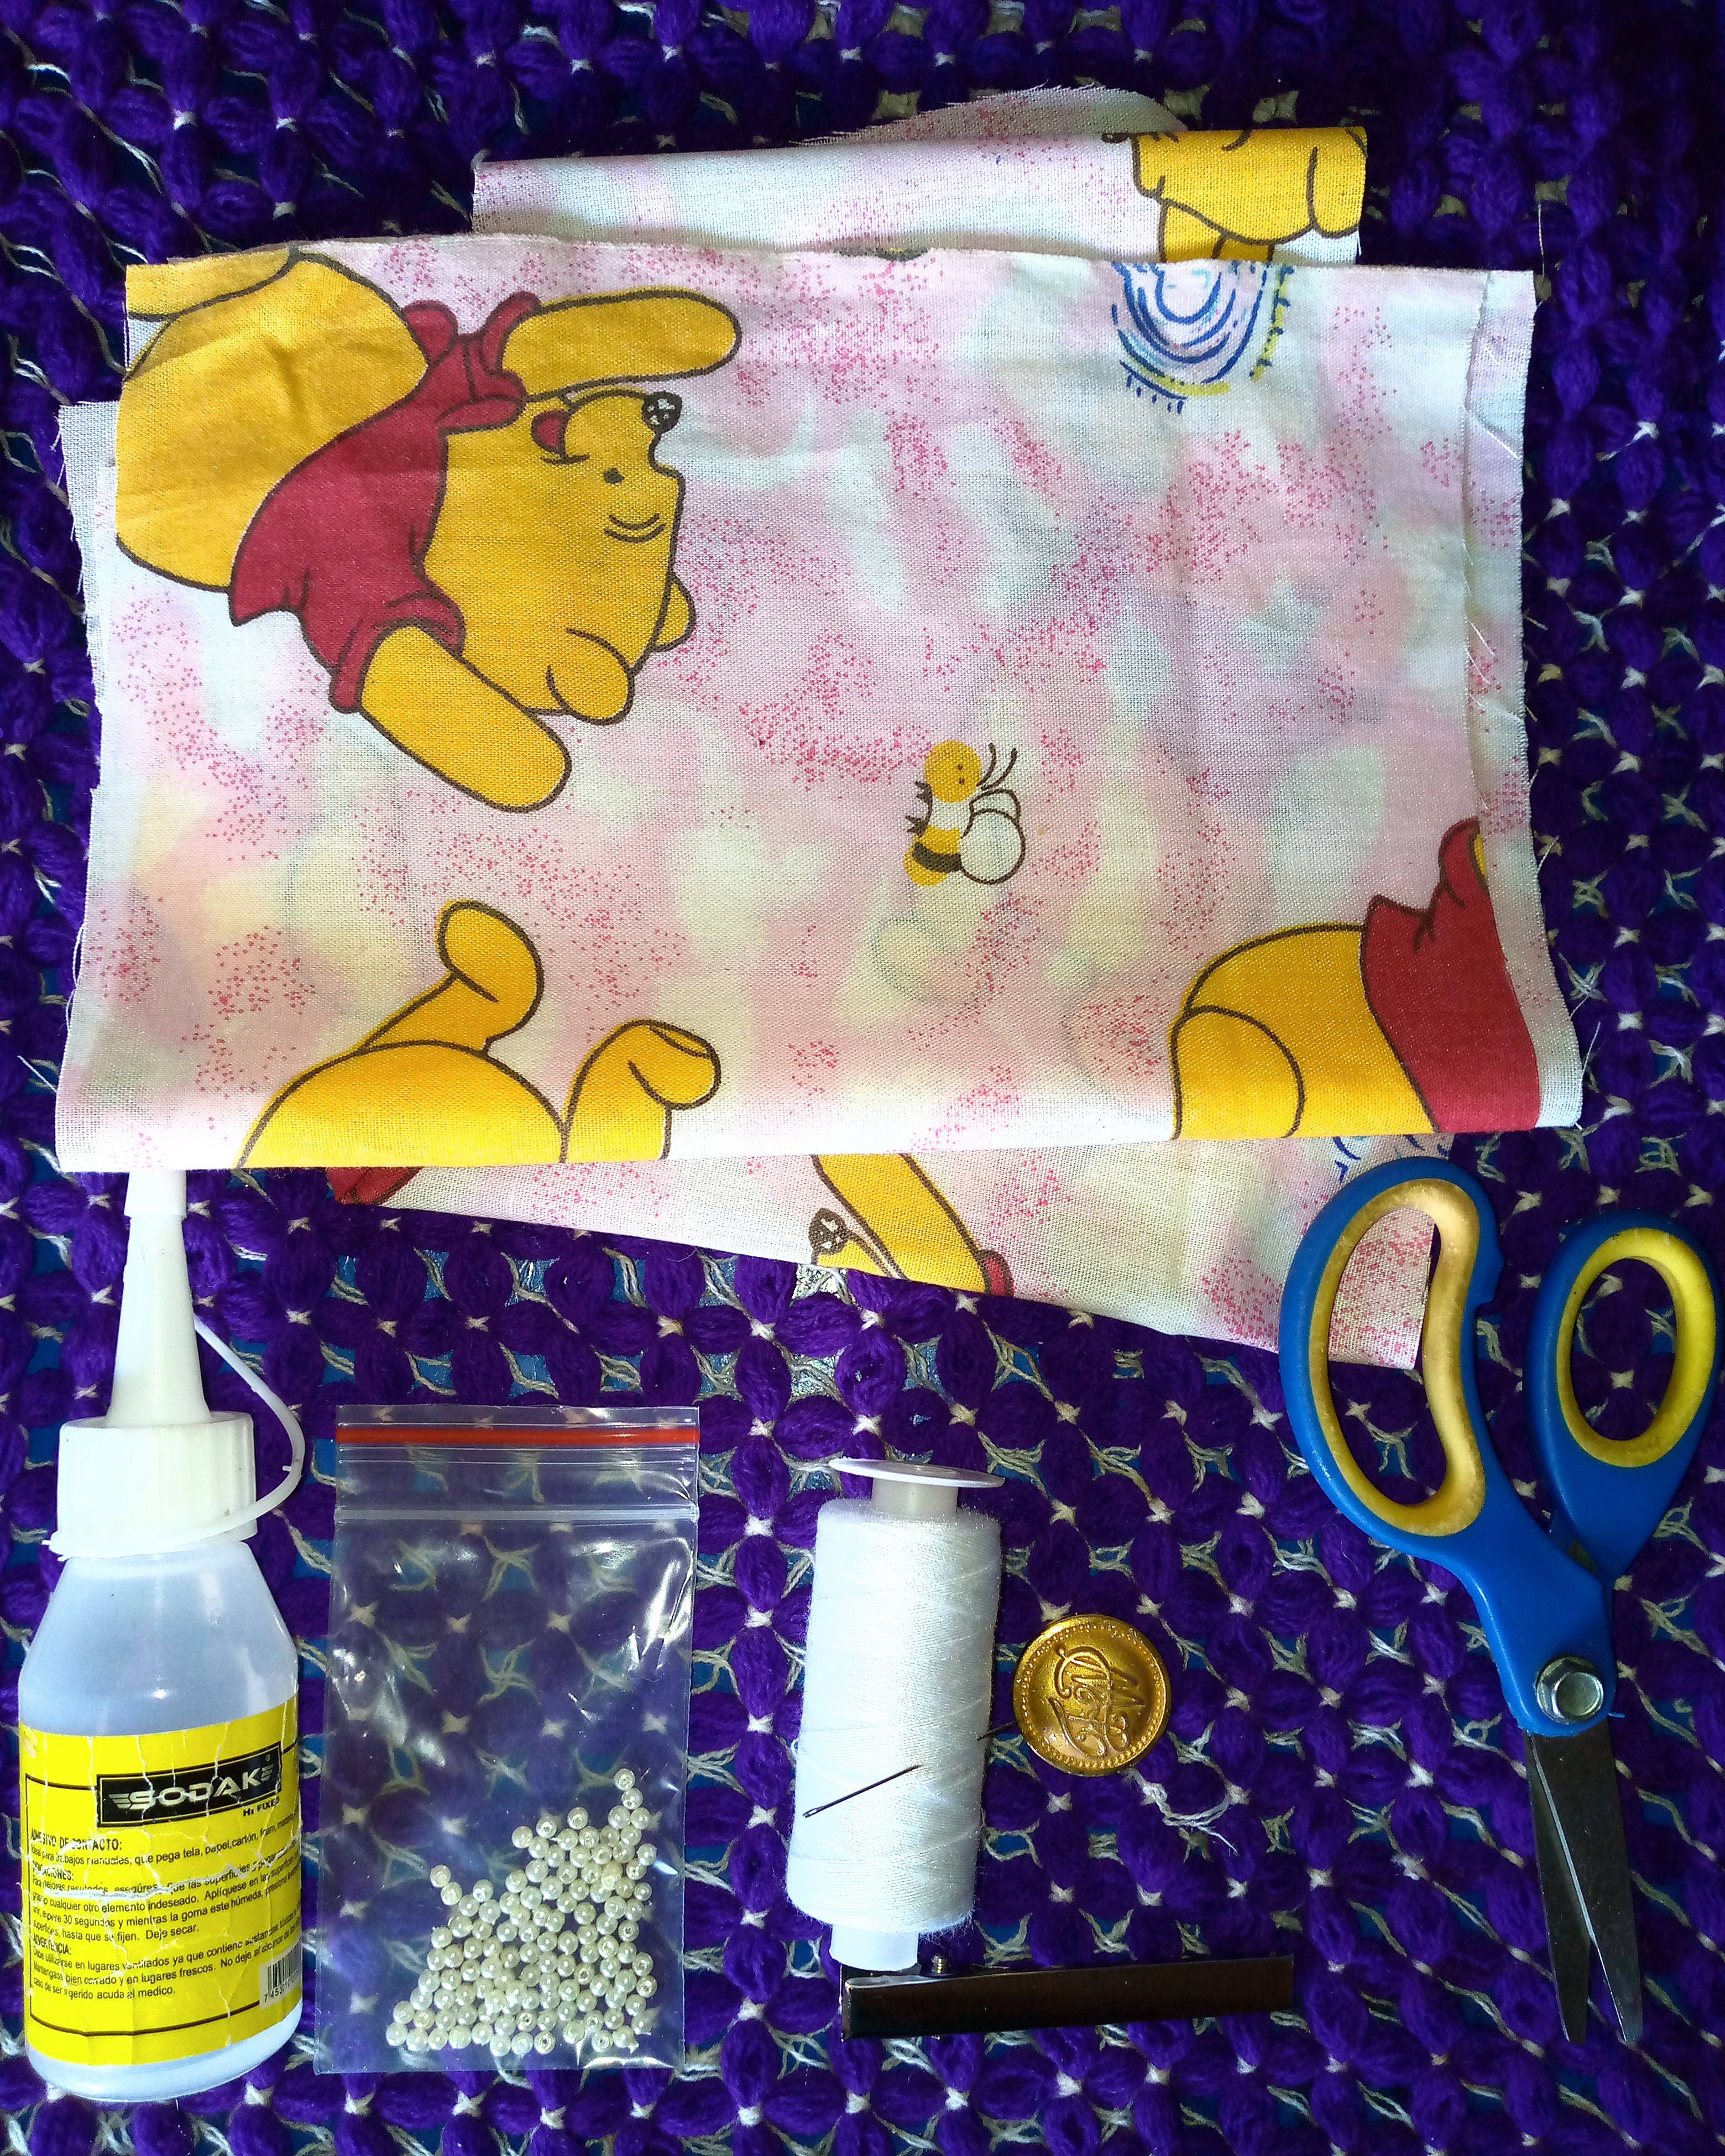
Materiales que usé :

Materials i used :

  • Trozos te tela
  • Tijeras
  • Hilo y aguja
  • Perlas decorativas (opcional si deseas colocarlas por si no tienes el botón dorado)
  • Silicon
  • Pinza de cabello

  • Pieces of fabric
  • Scissors
  • Thread and needle
  • Decorative pearls (optional if you want to place them in case you don't have the gold button)
  • Silicon
  • Hair clip

🎀(Pasos a seguir.)🎀

(Steps to follow)

Paso 01

Empezamos mis amigos cortando nuestras piezas base del lazo que tendrían las siguientes medidas (cuadro 22 cm de ancho x 20 cm de largo, rectángulo que 2 piezas tienen una medida de 24 cm de largo x 10 cm de ancho y abajo le vamos a dar unq caida,rectángulo para unir las 2 piezas del lazo 7 cm de ancho x 10 cm de ancho) una vez las tengamos cortadas camos a coser el cuadrado dejando un espacio pequeño sin coser que es por donde vamos a darle vuelta al moño, cosemos las otras piezas como se muestran en la imagen.

Step 01

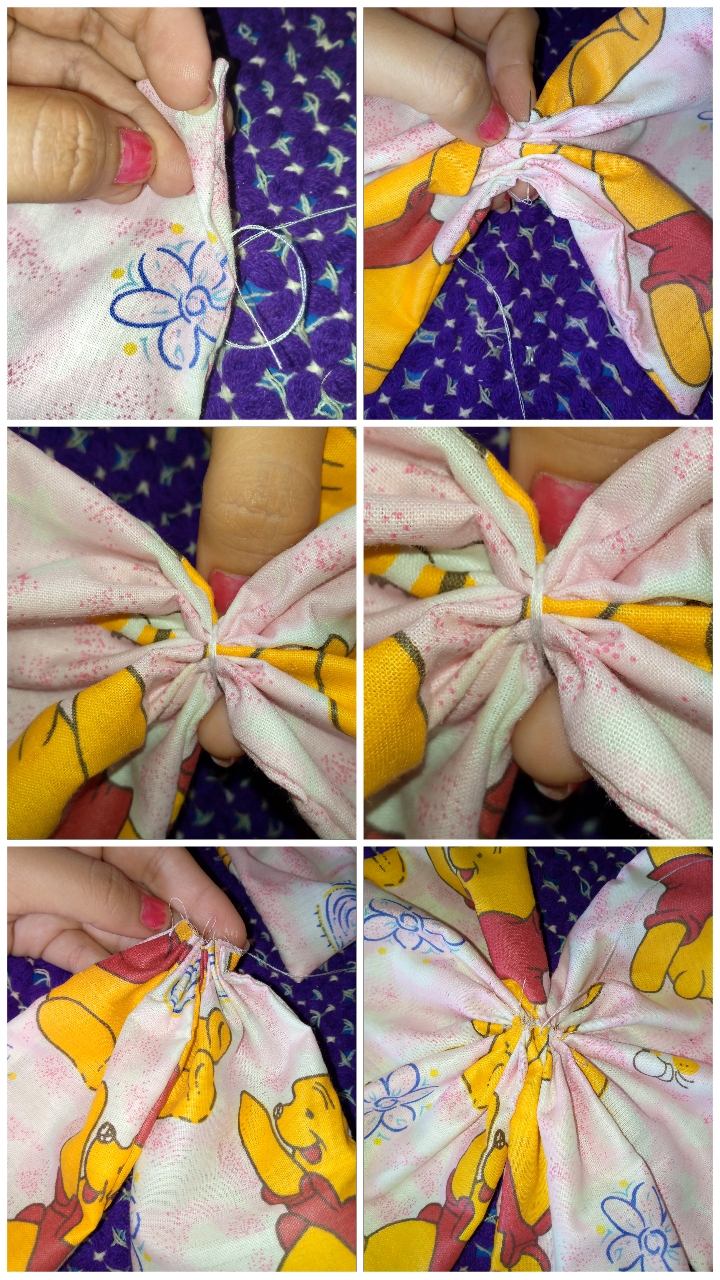
My friends, we started by cutting our base pieces of the bow that would have the following measurements (square 22 cm wide x 20 cm long, rectangle 2 pieces have a measurement of 24 cm long x 10 cm wide and below we are going to give you a fall, rectangle to join the 2 pieces of the bow 7 cm wide x 10 cm wide) once we have them cut we go to sew the square leaving a small space without sewing which is where we are going to turn the bow, we sew the others pieces as shown in the picture.
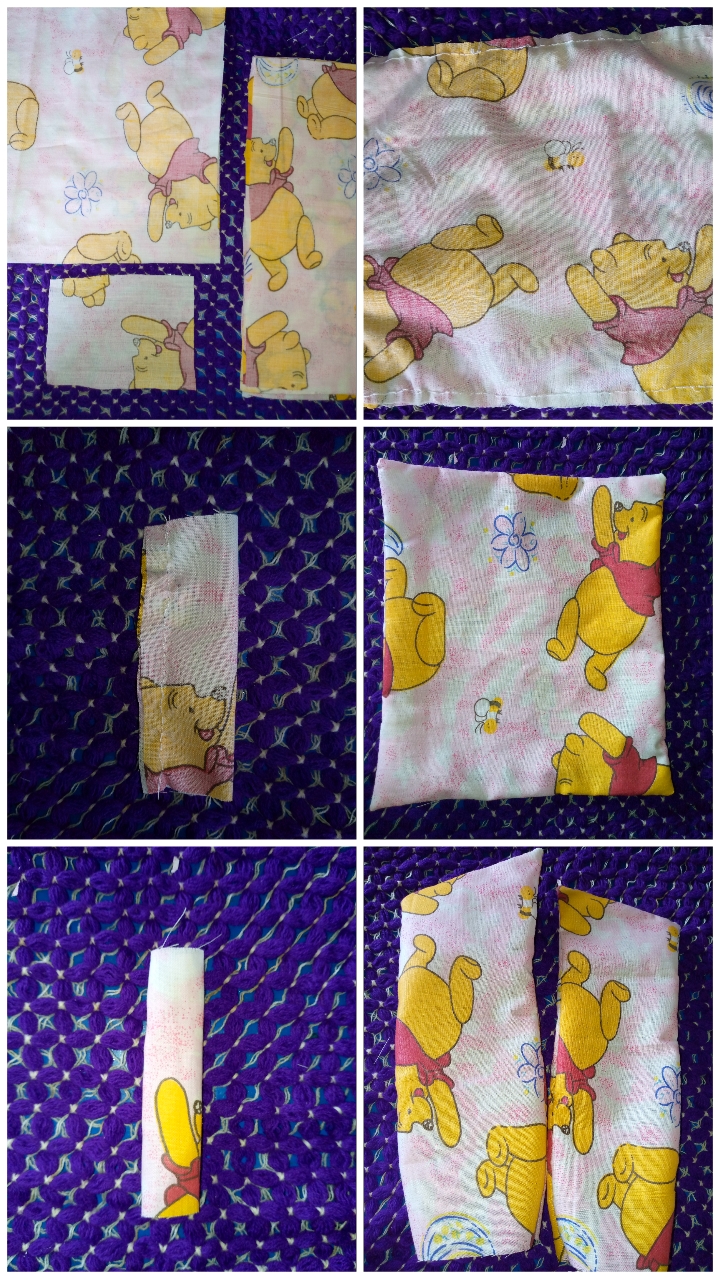
https://images.hive.blog/DQmb4tfH7QPGmbtYmpiZMe9Zbu6pEL5811rY6hJxr63haTb/Picsart_24-05-27_14-22-07-360.jpg


Paso 02

Como siguiente paso procedemos a coser con costura invisible la abertura de la pieza cuadrada que se dejó abierta para voltear el lazo esto lo hacemos que no se vea,luego vamos a coser y fruncir el cuadrado formando nuestro moño luego unimos las piezas rectangulares al moño y así lo tenemos armado .

Step 02

As the next step we proceed to sew with an invisible seam the opening of the square piece that was left open to turn the bow, this we make so that it cannot be seen, then we are going to sew and gather the square forming our bow, then we join the rectangular pieces to the bow and That's how we have it set up.

https://images.hive.blog/DQmRapZuWKdGVTNupCXZ9XmpP7L4yg8SAd9pvhEP6zfbhZ5/Picsart_24-05-27_14-23-23-701.jpg


Paso 03

Pasamos a forrar la pinza esto lo hacemos para que pueda adherirse al moño con facilidad o pegarse bien ,caemos lo siguiente cortamos un trocito de tela rectangular y lo pegamos por el lado superior de la pinza ,vamos a cortar las partes por donde no se puede meter nuestra tela y sacamos solo la forma de las que vamos a pegar hacia adentro en forma de pequeñas alitas alrededor de la pinza ,le echamos silicón doblamos y vamos pegando hacia adentro que quede bien sujetado de esa manera nuestra pinza quedaría bien forrada .

Step 03

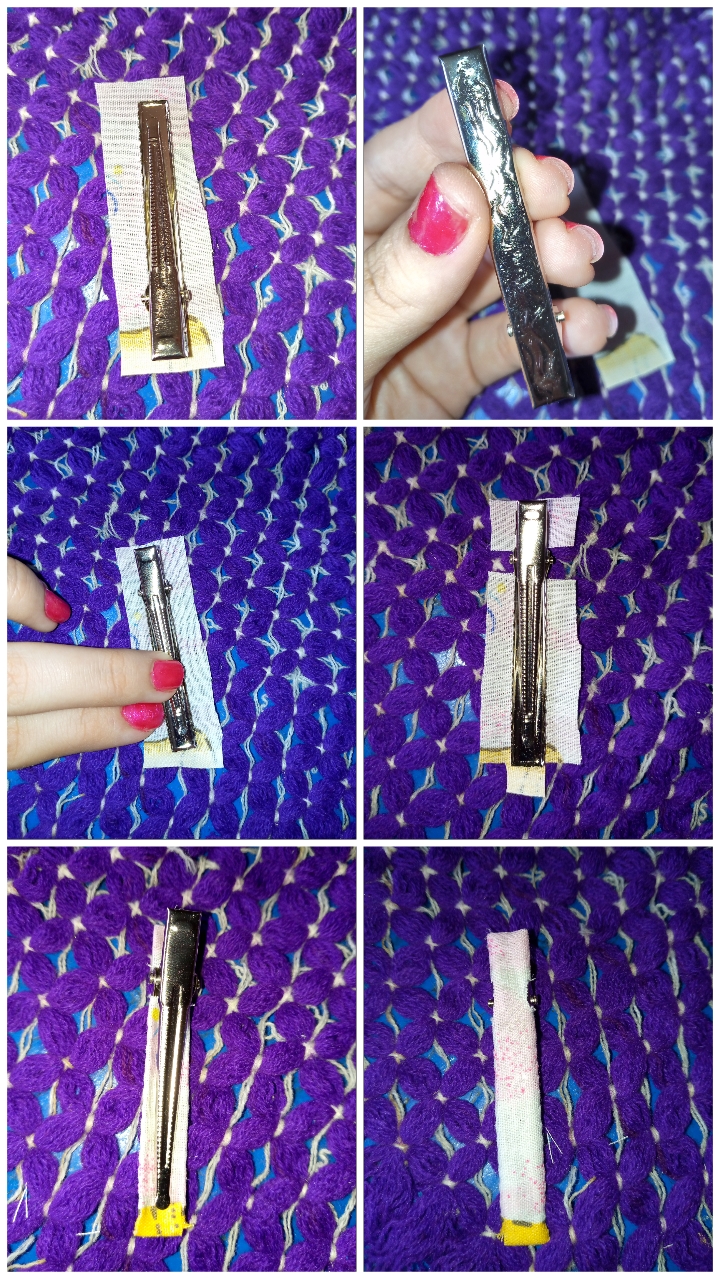
We move on to lining the clip, we do this so that it can adhere to the bow easily or stick well, we do the following: we cut a small piece of rectangular fabric and glue it on the upper side of the clip, we are going to cut the parts where it cannot be Put our fabric in and we take out only the shape of the ones that we are going to glue inwards in the form of small wings around the clamp, we add silicone, we fold it and we glue it inwards so that it is well held in that way our clamp would be well lined.

https://images.hive.blog/DQmZQA7bvDwceYaSLLJ8h8yznZpPFSGQNRVNPtABybkukZK/Picsart_24-05-27_14-24-25-788.jpg


Paso 04

Pasamos a pegar nuestra pinza al moño por el lado inferior luego cosemos el pequeño rectángulo que va a unir el moño le damos vuelta y cosemos para sellar el rectángulo de una manera que no se vea la costura y así es como queda cosido.

Step 04

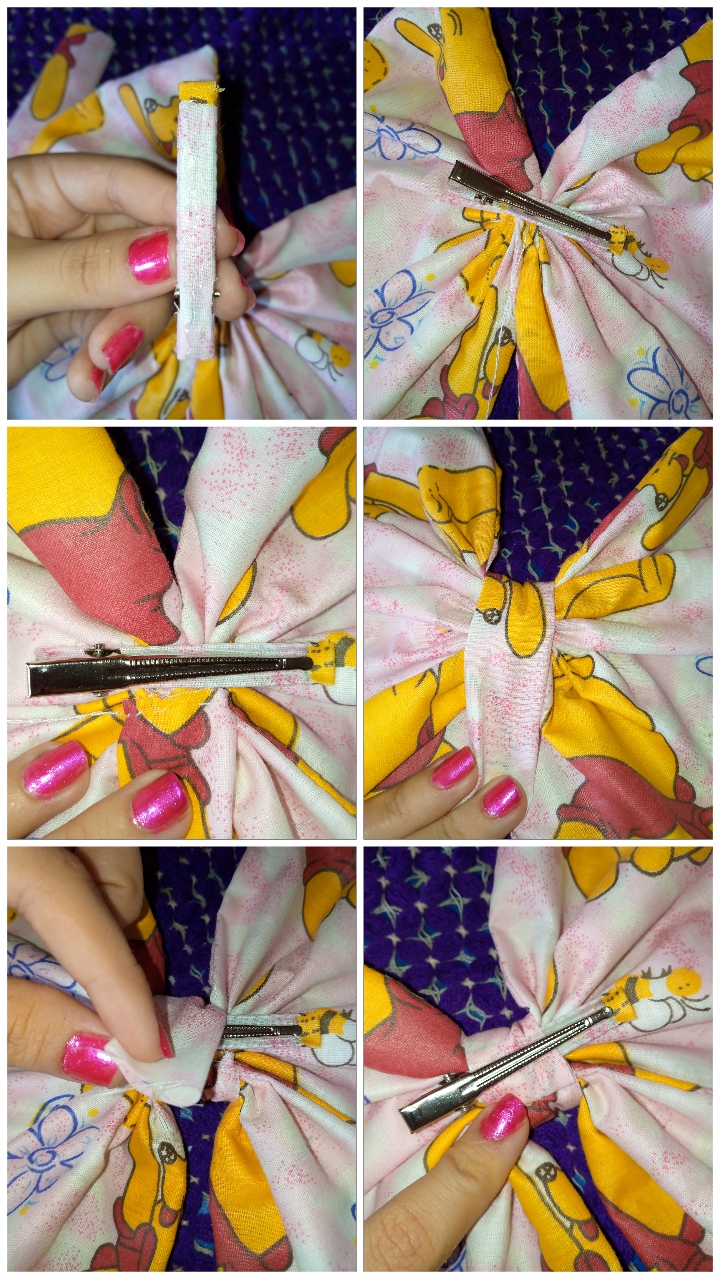
We proceed to glue our clip to the bow on the lower side, then we sew the small rectangle that will join the bow, we turn it over and sew to seal the rectangle in a way that the seam is not visible and this is how it is sewn.

https://images.hive.blog/DQmXHL4vJ7LBJdyT792b9eebdEJpCK7HeRyMUXnq2wTL6vh/Picsart_24-05-27_14-25-18-051.jpg


Paso 05

Como último y sencillo paso "La Decoración" vamos a coser nuestro botón de metal dorado como les dije al principio pueden usar perlitas para sustituir el botón en caso de no conseguirlo ,podemos hacer lindos diseños con las perlitas como corazones o florecillas chiquitas para adornar y darle un tono mas delicado al moño de esa manera hemos terminado el moño Coquette.

Step 05

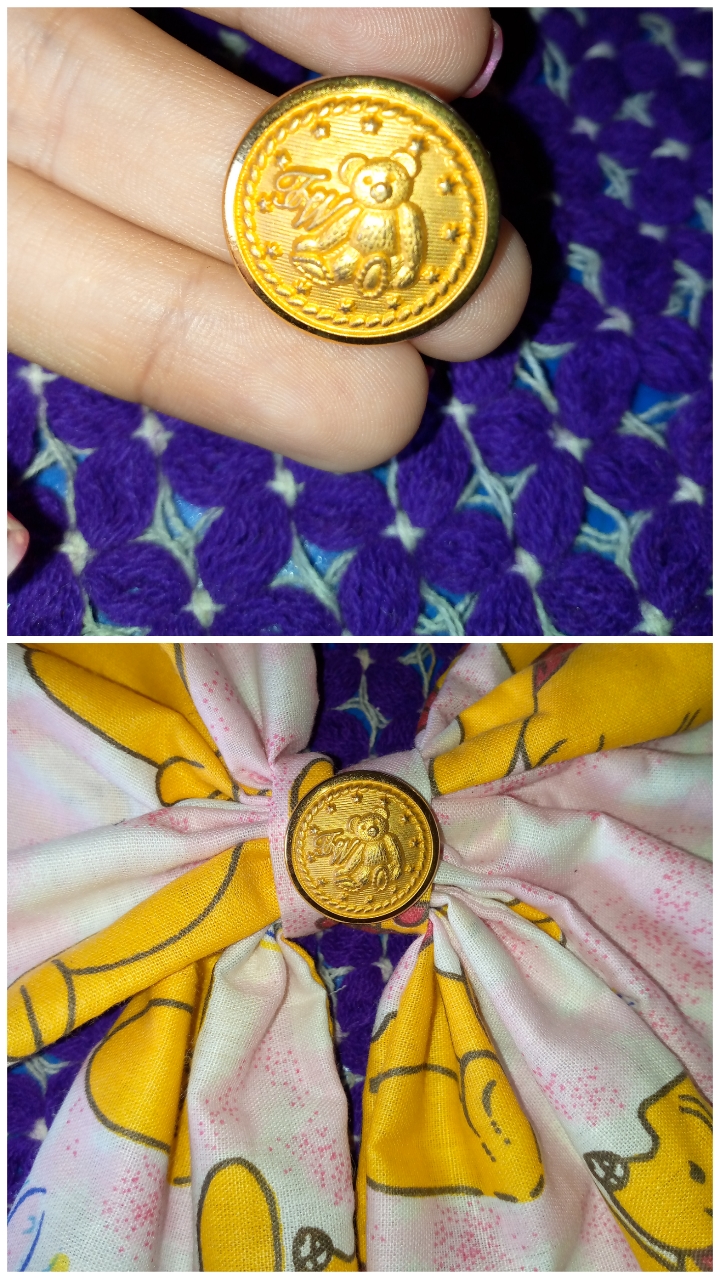
As the last and simple step "The Decoration" we are going to sew our golden metal button, as I told you at the beginning, you can use pearls to replace the button if you can't get it, we can make beautiful designs with the pearls such as hearts or small flowers to decorate and give a more delicate tone to the bun that way we have finished the Coquette bun.

https://images.hive.blog/DQmSdfNNPu3bUwea6boYZvAuLb7SzpJfZHpdgMxVJcxcjyh/Picsart_24-05-27_14-27-00-624.jpg


🎀Resultado🎀

Resultado

https://images.hive.blog/DQmT5NrCAjP4yqMru9AqH3s5fgALnwd6RVkTKkVuhyXNvKE/Picsart_24-05-27_17-34-24-809.jpg

https://images.hive.blog/DQmNv3GwqywyGRBRGps1FZfCvZRE2J82PEteCAeRfdmFSbu/Picsart_24-05-27_17-35-59-566.jpg

https://images.hive.blog/DQmXP5mHSBxGJ9fo4FoUFeQLU9Ka1QV5PdbdVzvYgK6Wi9R/Picsart_24-05-27_17-37-07-730.jpg

🦋✨Todas las imágenes de esta publicación son de mi autoria ,📱tomadas con mi celular TecnoSpark8C |📸Fotos editadas en PicsArt. Texto traducido en el traductor de Google.

🦋✨ All the images in this publication are my author ,📱taken with my TecnoSpark8C cell phone |📸Photos edited in PicsArt. Text translated in Google Translate.


https://images.hive.blog/DQmSXKqMdjNaSwQcs78ufeDmMmN9CDaNH9EVWWKZFNq7PLi/Post%20de%20Instagram%20Podcast%20Beige%20Neutro%20_20240517_133002_0000.png


Comments

Sort byBest